Showing posts with label scrapbooking tip. Show all posts

4.22.2016

The Future of EcoScrapbooking

It's been nearly a year since I posted to EcoScrapbook. 

Life has gotten busy and I became the blogger who couldn't create new weekly content. I never thought it would be me. But it is what it is.

Over the course of a year, I didn't craft much and struggled with the future of EcoScrapbook. It was my un-craftable year and a time of being un-eco-friendly (not by choice).

My year of un-crafting made me rethink my ecoscrapbooking habits. 

There are businesses that don't have much sense of recycling and I found myself involved with two of them. I felt like a hypocrite. At EcoScrapbook, I preached about being green, but out in the work force, I have zero control of what can be recycled and what has to be trashed. It's been a daily internal struggle.

Since I was barely scrapbooking (thank goodness for mobile scrapbooking...PicsArt!), I began to take less photos. It's not that I stopped taking photos altogether (I have plenty in my gallery).

I started to enjoy life's moments by watching them without a lens in front of me.

I didn't rush to pull out my camera every time life needed to be documented. For so long, I recorded videos at school events and then finally realized that nothing compares to seeing my children through my own eyes. There's a connection you can only get when a camera isn't stealing the spotlight.

As I changed, I thought more about the bigger picture. I'm interested in the idea of teaching younger generations to take action and be more eco-conscious. In order for me to do that, my focus can't be on deciding what content to post next on EcoScrapbook.

With Earth Day here, I felt the urge to create a new post. I didn't expect it to turn into a decision on the future of EcoScrapbook.


What is the future of EcoScrapbooking?

That depends on you and how eco-conscious you want to be. I laid the groundwork as I presented creative and easy ways to craft and scrapbook with the Earth in mind.

The EcoScrapbook Blog and ebooks are your source for green scrapbooking and crafting. Whenever you need inspiration, just stop by and peruse my archived material or download an ebook.

As for me, I will continue to change the way I scrapbook and never stop thinking about how to turn trash to treasure. 

The EcoScrapbook Facebook page and YouTube Channel will still be up and running. Please follow along if you haven't already and I hope we can continue our community on social media. ~Danielle


1.26.2015

Layout a Day Blog Hop: Advice for Newbies


Are you ready for a scrappy month? I sure am! I'm Danielle and have been participating in Layout a Day since 2010! I think this will be my 13th LOAD. You'll find me on Flickr as EcoScrapbook. Since you'll be visiting several blogs today, I wanted to make this quick and simple for you, so if you're short on time, the important information is in bold text. See you in February!

Here are my Top 10 Tips for Layout a Day Newbies:

1. Stock up on adhesive. Glue runner. Glue Dots. Adhesive tabs. Washi tape. They all work and you're going to need plenty of them.

My Organized Adhesive Drawer

2. Let creativity be your guide. Although it's not required to follow every prompt, keep your mind open and allow for an idea to pop in your head and go for it.

3. Embrace imperfection. Blurry photos? No problem. Mix-matched letters? That's okay. Journaling or paint mistakes? Who cares? One of my favorite scrapbook layouts is perfectly imperfect:

"Playhouse" Scrapbook Layout: LOAD211 Day 10 

4. Try something new. Have you ever stitched on a layout? Distressed photos? Paint your own background cardstock? Whatever you've been wanting to try, don't be afraid of mistakes, just do it! Hey, I even cut a completed layout into four pieces for a pocket page:

"Unwanted Visitors" Scrapbook Layout: LOAD514 Day 16

5. Create a space for your layouts. Maybe it'll be a box or a temporary scrapbook, you'll be creating so many layouts, you won't have time to stay organized.

6. Organize your craft area. If you're a traditional scrapbooker, you WILL make a mess this month:

My dining room table on Day 13 during LOAD 10/10.
Start off the month right by organizing your crafty space. You'll know what you have or what you need to buy (see #1) and will scrapbook faster if you do. 

7. Establish a routine. Maybe you'll scrapbook before work or after the kids go to school. Carve out time in your busy schedule and try to stick with it. If you only have 30 minutes, you can still do it. If there are days when you have less than 15 minutes, download a photo app and create a quick digital page. Here's one I made using PicsArt:

"Retro 'Rents" Digital Scrapbook Layout: Day 25 LOAD515

8. Expect the unexpected. No matter how much you prepare, you will end up scrapbooking photos that you never planned on and journal about memories you had forgotten about. You will learn more about yourself and your scrapbooking style AND you will be inspired!

"Goodbye" Scrapbook Layout: LOAD212 Day 8

9. Don't forget why you scrapbook. You are your own storyteller. If you're participating in Layout A Day, then you know it's your responsibility to document your story for your family and future generations. We're making treasures to share and that's important. 

Finished Scrapbook Layouts from LOAD212

10. Support your fellow LOADsters. Leave positive comments in the gallery as much as you can. Join in discussions when you feel the need. Don't be shy. We're cool people. 

See what other LOAD alums have to say:


5.21.2014

Digital Scrapbooking with the PicsArt App

My favorite way to scrapbook is with my hands. Cutting up paper, adhering photos and handwritten journaling are all an artistic release for me. However, I love the ability to scrapbook on the go with the PicsArt app on my phone.


I've used the free app for a couple years and it's great for editing photos, as well as creating collages. Once I got the hang of it, I began designing my own digital scrapbook layouts and layering various elements.

"Aunt Mary" Digital Scrapbook Layout - Took photo of an old photo and created the layout as a tribute to my recently deceased Aunt Mary.

Since it's Layout a Day month and May is often busy for me, PicsArt has been handy, allowing me to scrapbook when I'm not in my craft room.

"Music" Digital Scrapbook Layout - Designed a photo collage of faraway photos and added it to a background I designed in PicsArt. This is a great way to scrapbook several blurry or grainy photos.

"Cameron Dallas" Digital Scrapbook Layout - No, I'm not obsessed with a teenager, but I did make this page for my oldest daughter. She supplied the collages and I brought them together.

For the past three years, I make a year-in-review photo book where my digiscrap layouts are mixed in with my favorite photos. These pages will definitely be in my 2014 book.

"This Girl" Digital Scrapbook Layout - Once again, I played with the background and added another collage, but this one was of my youngest after she lost her first tooth. 


Do you have a favorite phone app for scrapbooking? ~Danielle


Related:


1.25.2014

It's a Layout A Day Blog Hop!

Welcome to the Pre-LOAD Blog Hop! If you're just joining in, the fun starts at Kelli's blog. We're getting ready to bust the myths of scrapbooking during February. Let's find out the many ways to prep for a month full of scrapbook layouts...


I'm about to start my 11th Layout a Day next month and prepped like no other LOAD. You see, I've never attempted to focus on one scrapbook album during these day-to-day challenges. I'm usually skipping around throughout the years and juggling several scrapbooks at once. 

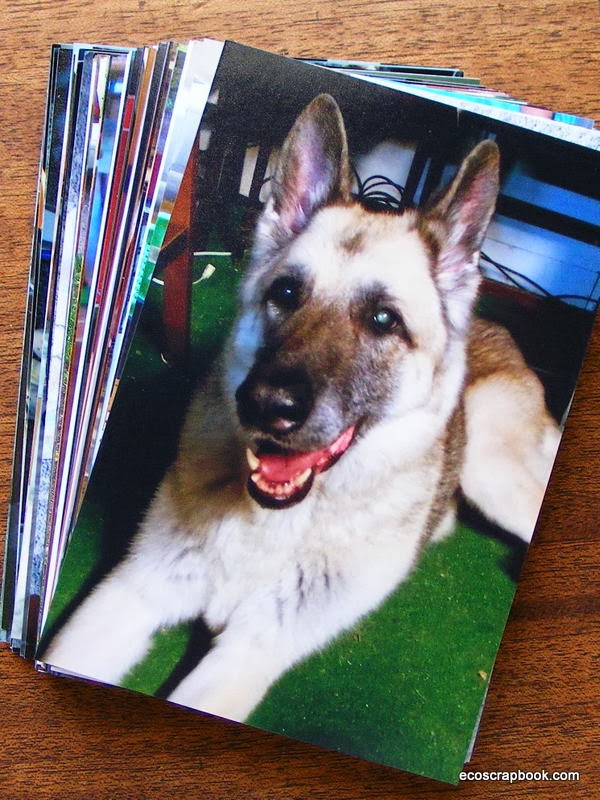
This time, I have one stack of photos to scrapbook during February's Layout a Day and they all feature my recently deceased German Shepherd, Tabatha:


As I write this, there are no tears, but I certainly expect to go through a box of tissues next month. I plan to use scrapbooking as therapy and celebrate my dog's life in her pet memorial scrapbook (requested by the hubby). 

I've stocked up on adhesive and already started the journaling:


I will be using a 3-ring binder by Terracycle:


 I have FSC-certified cardstock ready to go:


And for the first time, will only stick to Basic Grey cardstock (also eco-friendly):


To top it all off, I'm finally going to scraplift some layouts from my scrapbooking board on Pinterest. I've already created my first pet memorial scrapbook layout to get things started.

So, fellow LOADsters (and fans from a far... there's still time to sign up for LOAD), prepare yourself for plenty of doggie scrapbook layouts in the coming weeks. I hope to complete the entire album by February 28! Follow my journey on Flickr! ~Danielle

P.S. Don't be surprised if this little guy makes his way onto a digiscrap page (for days when I'm short on time):

Bane: Our New Puppy

It's now time to continue the blog hop! Connie is up next!

Here's the list of participants:

 Kelli
Dani
Valerie
Karen
You're here--> Danielle
Connie
Sherrie
Cara
Heather
Kim
Christy
Lisa E
Lisa H

12.11.2013

An Eco-friendly Christmas Scrapbook Layout

"Capture the Moment" 8.5x11 Eco-Friendly Christmas Scrapbook Layout
 
As I scrapbooked my 2012 Instagram photos, I included not only good quality photos, but also the bad ones. There are times when moments fly by so quickly, like when my girls had a brief encounter with Santa, and time was limited to snap the perfect shot. 

I still wanted to capture the moment and document the magic of Christmas when I was on the dance recital stage with my girls and Santa, as well as when we watched the the Toledo Zoo's tree light up for the first time of the season.

Scrapbooking is all about the memories and sharing them with others and I think I did just that on this eco-friendly scrapbook layout. ~Danielle

Supplies: FSC-certified cardstock, October Afternoon cardstock and embellishments, Cosmo Cricket notecards and stickers, stamp, twine, two Instagram photos.

Related:


10.16.2013

A Build-A-Bear Doppelganger Says Boo!

A Build-A-Bear doppelganger says boo! Say what? 

As our sweet furry cat relaxed on the dining room floor, she had no idea what was coming. My daughter brought home a new Build-A-Bear that looked almost like our cat. I snapped photos as the doppelganger crept closer and closer and finally, our cat turned around for the shock of her life!

"Boo!" 12x12 Halloween Scrapbook Layout Using Paper Scraps

I scrapbooked both the original photo and it's doppelganger, a shared square Instagram. You can see a close-up of our wide-eyed cat below:


This layout features paper scraps from previous projects. I just love creating the banner effect with my leftover scraps.

Stay tuned for more Halloween-themed scrapbook layouts this month! ~Danielle

Related:

What happens when you start a scrapbook layout with paper scraps?
Easy Business Cards You Can Do Yourself
8 Scrapbook Starting Points Using Designer Scraps

10.02.2013

4 Examples of Minimalist Scrapbooking

You don't need a long list of supplies to create an eye-catching scrapbook layout. When I'm perusing scrapbook layouts on Pinterest or Flickr, I tend to gravitate toward the ones with a lot of "white space" or minimal supplies. I like to put those pages into a category called minimalist scrapbooking.

I spoke briefly about minimalist scrapbooking in last week's post. Today, we'll look at four example layouts using minimal supplies.

One way to reduce the amount of supplies is to downsize layout size. Instead of always scrapbooking 12x12 pages, try making more 8.5x11 or 6x6 albums.

A plain sheet of 8.5x11 cardstock, washi tape, paper scraps and a few embellishments highlight this photo of the tablet I bought myself last Christmas:


"Tab" Supplies: FSC-Certified white cardstock, red scrap paper, Bo Bunny stickers, washi tape, Craftwork Cards Candi, black ink, Instagram photo.

Another scrapbook starting point with plain cardstock includes plenty of white space:


"What Happened to It?" Supplies: FSC-Certified white cardstock, CTMH cork arrows, Echo Park letter stickers, Instagram photo.

Many times, designers do most of the work for you and create an almost-finished look to decorative paper, making scrapbooking easy and less time consuming. I added a photo, washi tape, a few stickers and stitches to this scrapbook layout:


"Preschool" Supplies: Basic Grey decorative paper, cardstock, preschool-themed stickers, washi tape, thread, one photo. 

Here's another 8.5x11 scrapbook layout using decorative paper that's almost ready to go. It even includes a title:


"You Make Life Beautiful" Supplies: DCWV (I think) decorative cardstock, ink, two Instagram photos. Note: I trimmed 12x12 cardstock to create the 8.5x11 page, used circle scraps from the leftover strips behind the photos. The music note strips behind the photos where scraps from another sheet of decorative cardstock. I added lines for the journaling.

Read a more in depth discussion about minimalist scrapbooking by Zaira Sierra in her chapter of EcoScrapbooking: Crafty Ideas for Eco-Conscious Scrapbookers. Also, check out Zaira's new blog here with a featured layout by me. ~Danielle
Related:

Scrapbooker Saturday: Zaira
Fast Scrapbooking: Making Time for a Quickie and Where I Do It
Video: Organizing Paper Scraps

9.25.2013

A Favorite Scrapbook Layout: Us

As I mentioned last week, my husband and I recently celebrated our 13th wedding anniversary. We've been through a lot over the years and today's scrapbook layout, one of my favorites, documents our early relationship.

"Us" 12x12 Minimalist Scrapbook Layout

A couple of old photos, one sheet of gorgeous paper, a few embellishments and plenty of journaling show us that a bunch of supplies aren't needed to create a stunning scrapbook layout. I'll talk more about minimalist scrapbooking in next week's post. See you then! ~Danielle

Supplies: Me & My Big Ideas decorative paper, Bo Bunny letter stickers, black acrylic paint, bird and flower embellishments from Lisa of Recklinghausen Musings.


P.S. Are you ScrapHappy? I'm prepping for another Layout a Day in October, but this one is for ScrapHappy members only. If you're not already a member, check out True Scrap next month, another scraptastic event created by the one and only Lain Ehmann. Get your sneak peek of True Scrap 5 tomorrow (September 26) - Click here to view more details. It's free!

9.04.2013

How I Organize My Eco-Friendly Craft Supplies

As I become more of an eco-friendly scrapbooker and crafter, there are things I collect to use on my scrapbook layouts, upcycled projects and for the classes I teach. I've decided to share with you how I currently organize my stash of recyclables: coffee sleeves, clothing tags, puzzle pieces and so much more.

This is a Close To My Heart organizer with things from my baby shower (in 2002), assorted fabric and ribbons, tickets, dryer lint, playing cards, used gift cards, puzzle pieces, bread ties, produce mesh, clothing tags, etc.:


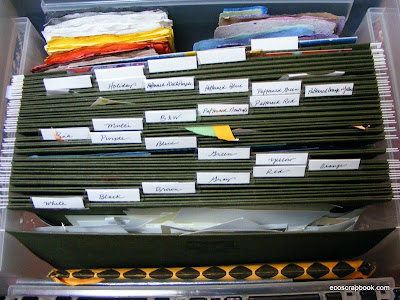
Here's how I organize paper scraps (check out this video for more info), along with paper I made with some of my scraps (back row):


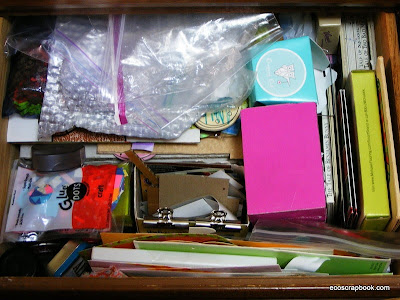
This is a desk drawer where I stash random things and the scraps from cropped photos:


Below is another drawer filled with cardboard, bubble wraps, boxes, Easter grass, children's books, extra baggies, etc.:


In the containers below, I save coffee sleeves, Glue Dots rolls, ribbon rolls, game pieces and other boxes that will eventually become mini-books:


Check out the foam, pill sleeves, old business cards, biodegradable ribbon, used Glue Dots containers, restaurant coasters and paper scraps leftover from books I've made:


And here's a basket filled with more random stuff I have yet to organize:


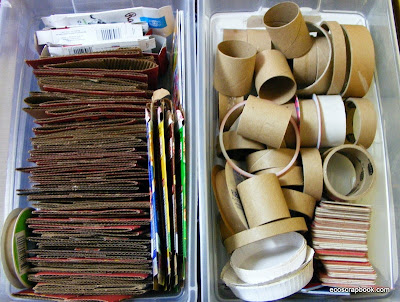
Old folders, mailers, cereal boxes and other cardboard get saved in this storage container:


And finally, the bottom shelf of my storage closet are an assortment of containers just waiting to be upcycled:


How do you organize your eco-friendly craft supplies? ~Danielle
Related:

My Simple Craft Room
Road Trip: Memories Scrapbook Expo & Jillibean's
9 Scrapbook Starting Points Using Paper Scraps

7.31.2013

Scrapbook Comparison: 2005 vs. 2012

Scrapbooking has come a long way, especially the way I scrapbook. If you've dug into my history, you probably read that I completed my first scrapbook at the age of four, but didn't start "modern" scrapbooking until I became of mom in 2002.

I was a chronological scrapbooker during those early years as a mother and scrapbooked almost every single photo (and back then, most of us were still using 35mm film). I did the big 12x12 albums by Creative Memories too and couldn't start another year's scrapbook without finishing the one I was working on.

Fast forward to present time and I've grown as a scrapbooker. I like to mix things up and with two children, plus a digital camera AND camera phone that get plenty of use, I simply don't have time to scrapbook chronologically or include most of the photos I take.

Traditional (and eco-friendly) paper scrapbooking is still where my heart is, but I've definitely utilized today's photo book options to include more photos, cut down on my scrapbooking time and save money. I only print my favorite photos and if I get around to scrapbooking them in my craft room, super! Otherwise, they're scrapbooked (with titles, journaling and embellishments) in the photo books I create. And if something happens to my photo books, most of them can easily be reordered, unlike the traditional albums that took hours to create.

Let's compare two of my scrapbooks! One is a 12x12 album from 2012 and the other is a photo book I created earlier this year from my 2012 photos.

Comparing Traditional Scrapbooks to Photo Books

These numbers were surprising! Yes, there's an obvious difference in size, but I didn't realize that both scrapbooks had about the same amount of pages. And I practically doubled the amount of photos in the 2012 album! (Thanks to digital, I take A LOT more photos!) Time and cost are huge factors in why I choose photo books for my yearly albums, as well as vacations and birthdays.

Time for the 2005 scrapbook included ordering prints, shopping for paper and embellishments and the amount of time I spent scrapbooking. For the 2012 photo book, I didn't have to shop, but time included editing photos, adjusting layouts, adding digital embellishments and journaling.

The cost for a traditional scrapbook included the album itself, pages, page protectors, adhesive, photo developing, paper and embellishments. On the other hand, the photo book cost included the book, additional pages (beyond 20 pages), shipping and tax, plus I was able to use a couple discounts and saved even more money (already figured in the cost above).

My biggest complaint about photo books and digital scrapbooking is that I have to spend extra time on the computer. I love playing in my craft room and getting creative, which is why I won't stop traditional paper scrapbooking anytime soon.

What are your thoughts? ~Danielle
Related:

Are You an EcoScrapbooker?
We can change how we scrapbook (so we don't look like this in the future)
Digital Scrapbooking: Camping at the KOA

7.24.2013

Are You an Ecoscrapbooker?


Do you consider yourself an ecoscrapbooker? If you save items from around the home or when you’re out and about with scrapbooking in mind, you’re definitely an ecoscrapbooker.

The habit of saving and using items like the ones above are so ingrained in my family that my husband saves his coffee sleeves and my girls get excited when they give me something they know I’ll use on a scrapbook layout... Continue reading my post at Messtaken Identity. ~Danielle

Related:

6.19.2013

What happens when you start a scrapbook layout with paper scraps?

Put those photos aside. Would you ever create a scrapbook layout without a photo in mind? Think about it. Imagine digging into all of your paper scraps, picking out some coordinating papers and creating a design on a blank slate.

That's what I did when I designed the scrapbook layouts below. You'll see the before and after pages. I had the pages ready prior to the start of Layout a Day, so all I needed to do was find out the prompt, add photos, along with embellishments and journaling, then I was done! This made scrapbooking every single day more of a breeze. Check them out...

For this page, I started with Jillibean Soup paper scraps:


Three Instagram photos and plenty of decorations later....


Next up, another layout with Jillibean Soup leftovers:


Let's add a mix of letter stickers, another Instagram pic, a Basic Grey flag and some Stickles:


I just loved these papers from October Afternoon:


And adding lots of bling!


Here's more October Afternoon paper scraps...


That were perfect for my trip to Chicago:


Here's one more layout full of October Afternoon:


And I decorated it with me (and old rub-ons from my stash):


Are you ready to start scrapbooking with only paper scraps in mind? Need more inspiration? See my posts below! ~Danielle

Related: