Showing posts with label paper scraps. Show all posts

6.11.2014

Scraplifting Myself

Over the years, I've learned to enjoy scraplifting layouts I love and using sketches. I used to be against these two forms of scrapbooking and didn't like copying other people's pages or being confined to a sketch. Then I realized, it's okay to use these tools as starting points. Most of the time, the end result doesn't even compare to the initial inspiration.

So what happens when I scraplift myself?

The first page was created as a featured layout for Layout a Day (May 2013). It's 12x12, filled with scraps and shows two photos, an original and it's Instagram.


I did the scraplift during Layout a Day (May 2014). It's also 12x12, but cut into four sections for the 6x6 pocket page. Scraps are also used, as well as two different photos.


I like to create unique pages, all different from the rest. And these two pages, even though very similar are still different. Different subjects. Different colors. Different embellishments. Different form. And both, a couple of my favorite pages.

How do you feel about scraplifting? Have you ever scraplifted yourself? ~Danielle

Related:


10.31.2013

Scrapbooking Halloween: Good vs. Evil

Happy Halloween! I've seen a crazy amount of costumes this year. Some make me smile, while others make me think "what the...?" And when it comes to my girls, one is usually evil, while the other sticks with the cute costumes. Yet, no matter what they chose, my girls make me smile:


To show this battle of good vs. evil, I meshed two scrapbook layouts together into one and dug into my paper scrap bin once again. Bright, happy colors are on the left (the good side) with darker colors on the other (evil) side.


At least the evil in this photo is trying to be good by giving the peace sign ;) Gotta love the kiddos! Hope your night isn't too spooky! ~Danielle

More scrapbook layouts using paper scraps:


10.16.2013

A Build-A-Bear Doppelganger Says Boo!

A Build-A-Bear doppelganger says boo! Say what? 

As our sweet furry cat relaxed on the dining room floor, she had no idea what was coming. My daughter brought home a new Build-A-Bear that looked almost like our cat. I snapped photos as the doppelganger crept closer and closer and finally, our cat turned around for the shock of her life!

"Boo!" 12x12 Halloween Scrapbook Layout Using Paper Scraps

I scrapbooked both the original photo and it's doppelganger, a shared square Instagram. You can see a close-up of our wide-eyed cat below:


This layout features paper scraps from previous projects. I just love creating the banner effect with my leftover scraps.

Stay tuned for more Halloween-themed scrapbook layouts this month! ~Danielle

Related:

What happens when you start a scrapbook layout with paper scraps?
Easy Business Cards You Can Do Yourself
8 Scrapbook Starting Points Using Designer Scraps

6.19.2013

What happens when you start a scrapbook layout with paper scraps?

Put those photos aside. Would you ever create a scrapbook layout without a photo in mind? Think about it. Imagine digging into all of your paper scraps, picking out some coordinating papers and creating a design on a blank slate.

That's what I did when I designed the scrapbook layouts below. You'll see the before and after pages. I had the pages ready prior to the start of Layout a Day, so all I needed to do was find out the prompt, add photos, along with embellishments and journaling, then I was done! This made scrapbooking every single day more of a breeze. Check them out...

For this page, I started with Jillibean Soup paper scraps:


Three Instagram photos and plenty of decorations later....


Next up, another layout with Jillibean Soup leftovers:


Let's add a mix of letter stickers, another Instagram pic, a Basic Grey flag and some Stickles:


I just loved these papers from October Afternoon:


And adding lots of bling!


Here's more October Afternoon paper scraps...


That were perfect for my trip to Chicago:


Here's one more layout full of October Afternoon:


And I decorated it with me (and old rub-ons from my stash):


Are you ready to start scrapbooking with only paper scraps in mind? Need more inspiration? See my posts below! ~Danielle

Related:


5.15.2013

Easy Business Cards You Can Do Yourself

Yes, you can fill out an order form and wait for a stack of business cards to arrive at your door. Or if you're crafty (I know you are), you can make your own business cards with extra scrapbook paper you've stashed away.

That's just what I did when I made my current business cards. I have plenty of paper scraps and wanted to use them to create new business cards for the class I taught at the Memories Scrapbooking Expo. I spent a few bucks on a personalized stamp (from Close To My Heart), trimmed my paper scraps to size and stamped away!

Danielle Hunter - EcoScrapbook - Scrapbook Designer & Instructor - DIY Business Cards - ecoscrapbook.com
DIY Business Cards

Instead of passing them out individually, I used Removable Glue Dots© to attach my business cards to the scrapbook kits I created for the class. Not only did they showcase my information, my DIY business cards acted as closures for the kits.

Not interested in stamping? Try making these unique bookmark business cards with recycled cardstock and a printer:

DanielleHunter Business Card Bookmarks-8
DIY Business Card Bookmarks
Even though I made those ones a few years ago, you can still find the tutorial on my old blog: How to Make Business Card Bookmarks Using Recycled Scrapbook Paper.

Have you made your own business cards? I'd love to hear about them! ~Danielle

Related:

3 Scrapbook Layouts That Use Photo Scraps
9 Scrapbook Starting Points Using Paper Scraps
8 Scrapbook Starting Points Using Designer Scraps

3.20.2013

8 Scrapbook Starting Points Using Designer Scraps

8 Scrapbook Starting Points Using Designer Scraps

I bet you have designer paper scraps stashed away. It's time to pull them out and get creative! I've found that I like to design a layout without a photo in mind and enjoy digging into my leftovers to see what kind of mix I can come up with.

By starting a scrapbook layout with paper scraps from a specific company or kit, it's easy to mix complementary designs and colors. And it's more fun to see how the layouts change once photos, titles and embellishments are added into the mix.

Let's have a closer look at my scrapbook layouts made with designer scraps. All layouts are 8.5 x 11 inches.

"Don't Hoard" scrapbook layout using Cosmo Cricket:

Don't Hoard LOAD213 Day 11

Supplies: black cardstock, paper scraps (Cosmo Cricket), letter stickers (Thickers), Distrezz-It-All, white acrylic paint, white pen, one Instagram photo.

"We Remember Moments" scrapbook layout using Simple Stories:

 Scrapbooking LOAD213 Day 1 

 Supplies: kraft cardstock, paper scraps (Simple Stories), sticker (Simple Stories), tabs (Creative Imaginations), stamp (Smash), black ink, two Instagram photos.

"Oh, Bother" scrapbook layout using Cosmo Cricket:

Oh, Bother - A BK Embarrassment LOAD213 Day 19

Supplies: gray cardstock, paper scraps (Cosmo Cricket), letter stickers (Thickers, Echo Park), black marker, one Instagram photo.

"Honey" scrapbook layout using Pebbles and paint:

Honey LOAD213 Day 5

Supplies: white cardstock, paper scrap (Pebbles), black acrylic paint, washi tape, letter stickers (Thickers, Cosmo cricket), black pen, two Instagram photos. 

"Nature Walk" scrapbook layout using Fancy Pants:

Nature Walk LOAD213 Day 3

Supplies: kraft cardstock, paper scraps (Fancy Pants, red cardstock), letter stickers (Cosmo Cricket), stamp (Smash), brown ink, brown pen, one Instagram photo.

"The Hill" scrapbook layout using MemoryWorks Whimsy Kit (April 2011):

The Hill LOAD213 Day 21 

Supplies: black cardstock, paper scraps (Basic Grey, My Mind's Eye, assorted color), diecuts (Jillibean Soup), tab and journaling card (Creative Imaginations), letter stickers (Simple Stories), one Instagram photo.

"A Perfect Day" scrapbook layout using Jillibean Soup:

Side Cut Metropark LOAD213 Day 2

Supplies: gray cardstock, paper scraps (Jillibean Soup), diecuts and stickers (Jillibean Soup), tabs (Creative Imaginations, stamp (Smash), brown ink, brown pen, butterfly punch, two Instagram photos. 

"Ankle Surgery" scrapbook layout using Simple Stories:

Ankle Surgery LOAD213 Day 12

Supplies: gray cardstock, paper scraps (Simple Stories), letter stickers (Cosmo Cricket), cork stickers (Close To My Heart), dots (Craftwork Cards), journaling paper (Smash), three Instagram photos.

Want more scrapbook starting points using paper scraps? Check out this post! ~Danielle

Related:

Making Handmade Paper
Video: Organizing Paper Scraps
3 Scrapbook Layouts That Use Photo Scraps

3.06.2013

Upcycled St. Patrick's Day Craft Projects

It's that time of year again! Bring out the clover decorations, catch those leprechauns and find a pot o' gold at the end of a rainbow! Kiss me, I'm Irish... St. Patrick's Day is near!

Some of my favorite and most popular craft projects were created just for March 17th, but the fun begins weeks before St. Patrick's Day. You can read more about our family fun and the leprechaun named Roger here

Today's post is a round-up of my upcycled St. Patrick's Day craft projects. Click the links for tutorials!

Upcycled St. Patrick's Day Crafts


Do you celebrate St. Patrick's Day? If so, what do you enjoy most about it? ~Danielle

1.09.2013

Eco-friendly Scrapbooking: Pause & Get Published


Recycle. I started this layout by reusing white cardstock from a previous project and flipped it over for a brand new page. You can find bulk 8 1/2 x 11 FSC-certified and recycled cardstock in the office supply section of most big box stores.

Save your paper scraps and get creative. Journaling strips and paper flowers are my top two ways to utilize paper scraps and that's just what I did on this page. I'm also a big fan of squares, so I designed a unique background from assorted paper scraps, a square punch and stamps.

Turn trash to treasure. What happens when an inexpensive wooden toy airplane breaks? You craft with it! The flower centers were punched from thin wood, formerly known as airplane wings.

Alter. If you plan on investing in embellishments, find ones that are alterable like the corrugated letters from Jillibean Soup that I painted black.

Low on supplies? A great way to add dimension when you're low on adhesive spacers is to use cardboard as I did behind the photo and title block.

Supplies: paper scraps, FSC-certified white cardstock, corrugated letters (Jillibean Soup), black acrylic paint, punches (square, flower, circle), stamps (flower, butterfly), black ink, cardboard, thin wood, adhesive (glue stick, tabs, Mini Glue Dots), Instagram photo. Layout is 8 1/2 x 10 3/4".

--------------------------------------

Do you want to be published in an upcoming eBook about eco-friendly scrapbooking? Now's your chance. Create a scrapbook layout (doesn't have to be a new page) using at least 75% eco-friendly/recycled materials and format a blog post like I did above (How is your page eco-friendly? Photo, supply list and layout size.) Email me, ecoscrapbooker (at) gmail (dot) com, the link to your post for consideration in the eBook. Deadline is January 31st. 

Read more about the project here and see the behind-the-scenes details here.

I look forward to seeing your eco-friendly scrapbook layouts! ~Danielle

Helpful Links:

11.28.2012

Making Handmade Paper

I did it!

Making Handmade Paper

Scratch that. We finally did it! Over the weekend, my mom and I made handmade paper together. We purchased our paper making kits last year from Paper Alice at the Great Lakes Mini Meet. A year later, our kits were still in their boxes and I told my mom I was staying at her house during Thanksgiving weekend so we can make paper. And that's what we did.

The process was simple after we watched this paper making tutorial and soon learned not to experiment until we got the hang of it. (Don't use food dye since it will rinse out or make your paper too thick - will take forever to dry!) We mixed together junk mail, scrapbook paper scraps, tissue paper, napkins, etc. to create our own one-of-a-kind paper.

Now, I can cross this task off my 2012 to do list and look forward to binding the papers together to create and decorate an ecoscrapbook. ~Danielle

Are you interested in joining the Eco-Christmas Blog Hop on December 12? Read more about it here and send me an email, ecoscrapbooker (at) gmail (dot) com, to join in the fun!

10.17.2012

9 Scrapbook Starting Points Using Paper Scraps

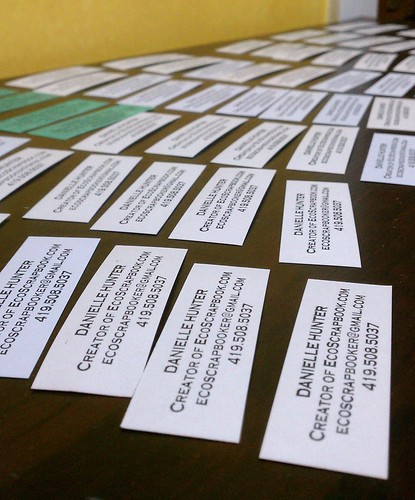
Over the summer, my girls and I dumped out a storage container full of paper scraps and organized them by color. During the process, I set aside some of the scraps to use on future layouts and also created a paper scrap organization video.

Thanks to the ScrapHappy Only Layout a Day, I finally had the push to create 9 scrapbook starting points using paper scraps and finish them:


Let's have a closer look:

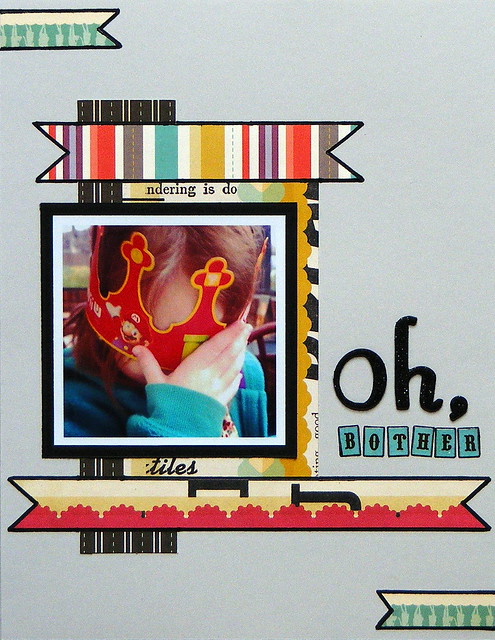
"Fresh Picked Worms" Scrapbook Layout
Supplies: Jillibean Soup sticker and diecuts, Simple Stories letter stickers, DCWV cardstock, paper scraps, Distrezz-it-All, black marker.

"Brown-Eyed Girl" Scrapbook Layout
Supplies: DCWV cardstock, paper scraps (including the bird I made), letter stickers (Jillibean Soup, Crate Paper), brown marker.

"Zombie" Scrapbook Layout
Supplies: DCWV cardstock, paper scraps, American Crafts letter stickers, (old) word bubble sticker, My Mind's Eye cartoon figure (circa 2000), paper confetti (from the Bind-it-All), acrylic paint, black marker. (Note: To create bloody brains, I glued the confetti to the cut-off head and added pink and red paint.)

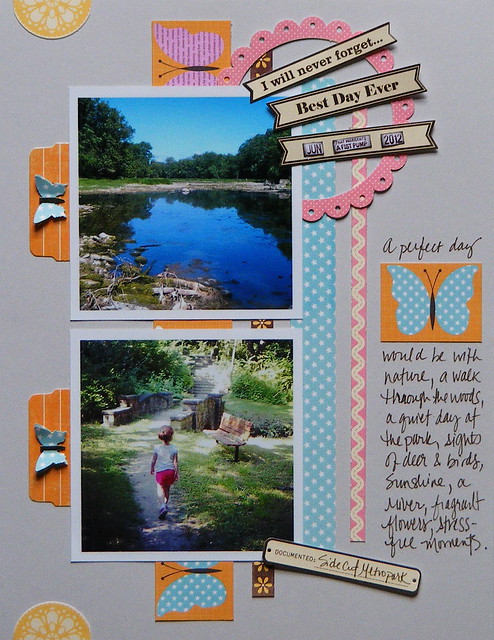
"Sandusky Bay KOA" Scrapbook Layout
Supplies: DCWV cardstock, paper scraps, stickers (Jillibean Soup, Sassafrass), black marker.

"You" Scrapbook Layout
Supplies: DCWV cardstock, paper scraps, American Crafts letter stickers, StazOn black ink, photo booth memorabilia, black marker. (Note: This is my favorite layout of the bunch.)

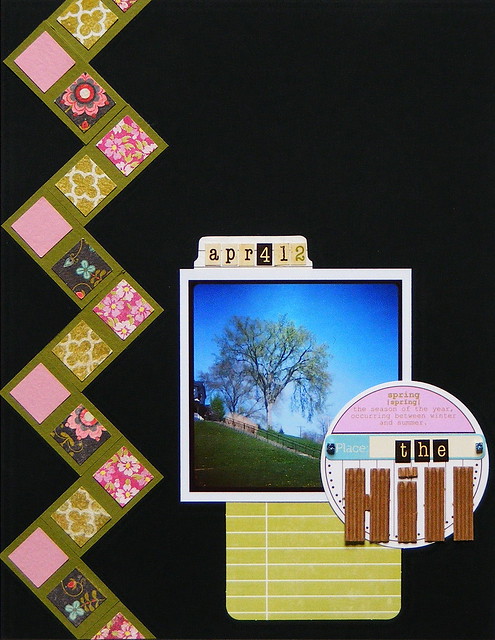
"Madison" Scrapbook Layout
Supplies: DCWV cardstock, paper scraps (from my daughter's baby announcements in 2008), assorted letter stickers, black marker. (Note: Photo taken by Rick Sheridan.)

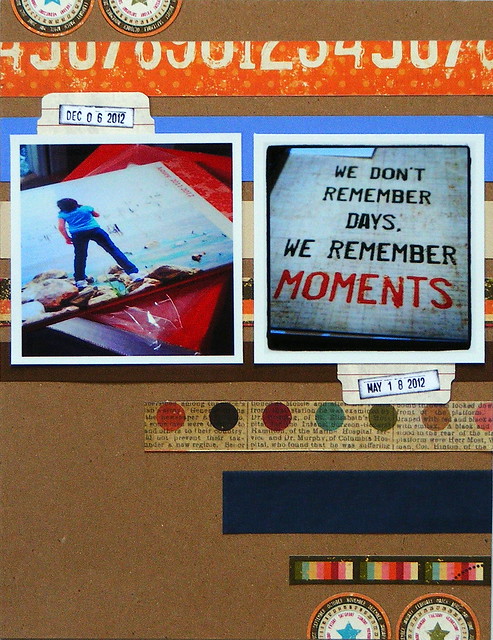
"A Photo Like This is Rare" Scrapbook Layout
Supplies: DCWV cardstock, paper scraps, Distrezz-it-All, Echo Park letter stickers, Close To My Heart stamp and ink, black pen, white pen.

"Miss Pres. Bill" Scrapbook Layout
Supplies: DCWV cardstock, paper scraps, corrugated cardboard, stickers (Echo Park, Jillibean Soup), Distrezz-it-All, white acrylic paint. (Note: I had two copies of this photo and cut out one to create a pop up effect.)

"Pets" Scrapbook Layout
Supplies: Paper (Pink Paislee, Cosmo Cricket), Jillibean Soup stickers and diecuts, Scenic Route letters, white paint marker, black pen. (Note: The center of the Pink Paislee paper was cut out for a previous project and I secured Cosmo Cricket scrap paper to create a full sheet to work with.) 

Most of us know about Shimelle's scrapbook starting points, but I wanted to challenge myself and start with paper leftover from previous projects. Now, I'm challenging you to do the same. Create a scrapbook layout using paper scraps and share the link to your project below. I'd love to see what you create! ~Danielle

Related:


10.10.2012

Scrapbooking: DIY Hexagons

Hexagons. I love this trend and get a little scrapbooker's delight every time I see them on a layout or card. Earlier this year, I created a scrapbook layout with my very own DIY hexagons:

"Big Bro" Scrapbook Layout With Hexagons

That's my big brother with his wife and son. I used paper scraps as strips for the background and the hexagons were made with this whatchamacallit:

Vintage Drawing Template

According to Ebay (I Googled it), it's a vintage Sterling 544 drawing template. Who knew? I guess I'm vintage too. I've had this drawing template since childhood.

Here's a close-up of the hexagons I made with a white pen and the vintage drawing template:

DIY Hexagons

I've gathered together a list of some other fun DIY hexagon projects you can use on your scrapbook layouts and cards. Enjoy! ~Danielle


Related:

The Unexpected Scrapbook Layout
3 Scrapbook Layouts That Use Photo Scraps
Video: Organizing Paper Scraps

9.12.2012

The Unexpected Scrapbook Layout

Most scrapbookers will tell you they have plenty of photos to scrapbook, albeit the majority wish they could dedicate more time to their craft. I'm one of those scrapbookers and know there's never enough time to scrapbook all the things that I want.

There are always stories to be told and photos to scrap. Each day is filled with new memories. So, what happens when someone unexpectedly asks you to scrapbook a found photo, on that's not your own? That happened to me the last day of Layout a Day in May.

If you haven't heard of Layout a Day (LOAD), it's a scrapbooking class created by Lain Ehmann where participants scrapbook and upload their layouts to Flickr every single day for a month. I first signed up for LOAD in May of 2010, participated a total of six times, which resulted in over 200 of scrapbook layouts. I view this scrapbooking class as a game-changer and it's made me a better scrapbooker.

Each day, LOAD participants are greeted with a prompt. Day 31's prompt was to create a layout using a found photo. At first, I wasn't going to follow the prompt since my last layout of each LOAD is usually some sort of collage of all the scrapbook pages I completed during the month. That was planned before I knew the prompt.

"LOAD512" Digital Photo Collage of Scrapbook Layouts

But then something unexpected happened. After I finished and uploaded my collage of layouts to Flickr, my preschooler came home with a photo of our family that was taken at her school's open house last fall. I had my found photo. It was scrapbooking destiny.

I started a new layout, but due to lack of scrappin' time, the page "Thru the Year" wasn't completed until the next day.

"Thru the Year" 12x12 Eco-Friendly Scrapbook Layout

This unexpected scrapbook layout ended up being my favorite layout during May's LOAD and in my top 10 layouts I ever created.

What I love about it is the use of white space, paper scraps, corrugated cardboard and most importantly, a found photo of my family. ~Danielle

Supplies: DCWV cardstock, Jillibean Soup (paper scraps, corrugated cardboard letters, stickers), Sew Easy thread, Cosmo Cricket letter stickers, corrugated cardboard, black marker.

See all my LOAD layouts from May here and my Flickr photostream here.

Related:


8.08.2012

Video: Organizing Paper Scraps

I did it! I uploaded my first craft-related YouTube video! Why? I'm a strong believer in saving paper scraps and finally have my best storage solution ever. Watch now to learn more:


If you don't know it already, I'm a bit on the dorky side and still have a lot to learn about making videos. Also, two days after I uploaded the video, I came across a pad of 12x18 inch decorative paper, so I take back what I said about scrapbook papers over 15 inches...they do exist! 

All of that doesn't matter. What matters is I went from this...


to that...


A perfect solution for organizing paper scraps.

Will there be another video? Maybe. I'd like to show you how I organize my paper. What do you think? ~Danielle

Related:

Tutorial: Using Paper Scraps to Decorate a Wedding Book
3 Scrapbook Layouts That Use Photo Scraps
3 Scrapbook Layouts That Use Paper Scraps

5.23.2012

Tutorial: Memorial Day Flag Centerpiece

Are you looking to add a little patriotic flair to your upcoming Memorial Day celebration? This flag centerpiece may be exactly what you need:

 
Supplies:

Craft Glue Dots©
glass jar
3 bamboo skewers
15" wire (red)
9 star buttons (red, white, blue)
large paper scraps (red, white, blue)
jar filler (buttons, candy, ribbon, etc.)

1. Cut each color of paper to 7x2". Fold in half and make a triangle cut at the end of each flag.

2. Attach the flags to the bamboo skewers with Craft Glue Dots©.

3. Place the flags into a glass jar.

4. Fill the jar with red ribbon-tied bells as shown or use buttons, candy, etc. as filler.

5. Thread the buttons onto the wire, wrap around the top of the jar and twist together to secure.

Now you have a quick and easy way to add a little red, white and blue to your Memorial Day picnic. Enjoy! ~Danielle

Additional Glue Dots Projects:

Upcycled Flower Carrier
This blog post was written while participating on the Glue Dots design team.

4.30.2012

Christmas Cards: Peace on Earth(Day)

After missing the last round of Jingle Belles, I decided to create three cards that upcycle "or in some way 'rescues' a bit of...well, SOMETHING" according to the most recent Jingle Belles Challenge: Peace on Earth(Day)


I rescued several vintage holiday cards during a recent trip to an antique mall for 50 cents each and three of them were recycled into the cards you see above. 

For each card, I continued using the pack of blank white cards of purchased last year, added a few paper scraps, ribbon on two cards and stamped on one. 

This is my favorite Christmas card:


I just love the color combo on that one.

My least favorite card is...


I feel it's too plain and I could have added a bit more color, but I still enjoy the "Yoo Hoo!" lady. And I most certainly got a chuckle out of the original sender's name...


Go ahead, take a moment to shorten the name (as I giggle like a little school girl). I kept the inside of the card the same and attached it the the inside of my card using a couple Glue Dots Glue Lines. I'll eventually cover our harry friend's name. Until then, this is what it looks like:


My final card doesn't seem too Christmas-like:


until you read the inside:


I still have a couple more vintage Christmas cards to play with, so you'll be seeing those ones within the coming months. You can see more recycled holiday cards over at Jingle Belles! ~Danielle

Related: