Showing posts with label Eco-Christmas. Show all posts

12.18.2013

10 Craft Projects for the Holiday Gift Shop

As a child, I always looked forward to my elementary school's Santa Shop so I can purchase gifts for my family (and a couple for me). When the opportunity to sell craft projects at my children's school presented itself, I knew my girls would be excited and I could put a huge dent in my craft stash.

Below are ten projects for this year's holiday gift shop.

1. Melted Record Ornaments:


2. Mini Christmas Notebooks:


3. Christmas Chalkboard Ornaments:


4. Wine Cork Candle:


5. Girl Scout Notebook + Decoupaged Comic Book Pencil:


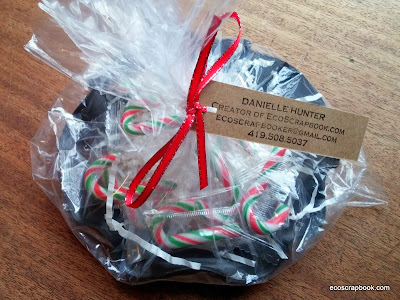
6. Melted Record Candy Bowl:


7. Upcycled Decoupaged Bangle Bracelets:


8. Cereal Box Notebooks:


9. Decorated Tootsie Roll Banks:


10. Glittered CD Ornament:


I wish I had more time to craft since it was so enjoyable making affordable projects (all under $3) for children to give their friends and families this holiday season.

Are you getting crafty for the holidays? ~Danielle

Related:

An Eco-Friendly Christmas Scrapbook Layout
Eco-Christmas Round-Up: 12 Crafty Gift Ideas
I wrapped a gift with newspaper and made a bow

12.11.2013

An Eco-friendly Christmas Scrapbook Layout

"Capture the Moment" 8.5x11 Eco-Friendly Christmas Scrapbook Layout
 
As I scrapbooked my 2012 Instagram photos, I included not only good quality photos, but also the bad ones. There are times when moments fly by so quickly, like when my girls had a brief encounter with Santa, and time was limited to snap the perfect shot. 

I still wanted to capture the moment and document the magic of Christmas when I was on the dance recital stage with my girls and Santa, as well as when we watched the the Toledo Zoo's tree light up for the first time of the season.

Scrapbooking is all about the memories and sharing them with others and I think I did just that on this eco-friendly scrapbook layout. ~Danielle

Supplies: FSC-certified cardstock, October Afternoon cardstock and embellishments, Cosmo Cricket notecards and stickers, stamp, twine, two Instagram photos.

Related:


12.19.2012

Christmas Gift Bag With Removable Scrapbook Layout

Have you ever thought about decorating a gift bag with a removable scrapbook layout? I sure did! Here's my tutorial:


Supplies:

Glue Dots® (Ultra Thin, Mini, Pop Up, Glue Lines, Removable)
star pins (Maya Road)
gift bag
FSC-Certified cardstock (black, yellow)
decorative cardstock (October Afternoon)
photo
Distrezz-it-All
black acrylic paint
paint brush
vintage ribbon
Petaloo flowers (large black, small green with red jewel)
buttons (red, green)
Stickles (Xmas Red, Holly, Black Diamond)
letter stickers (American Crafts Thickers)
hanger

Note: A red Petaloo flower was used for this project, but was painted black with acrylic paint and topped with black Stickles.


1. Cut, distress and paint edges of the yellow and decorative cardstock. Set aside to dry.

2. Attach buttons to hanger using Removable Glue Dots® and apply Stickles. Set aside to dry.

3. Distress the photo edges, mat with black cardstock using Ultra Thin Glue Dots® and distress the cardstock edges.

4. Use Ultra Thin Glue Dots® to attach two star pins to the top of the decorative cardstock and then adhere the yellow cardstock to the decorative cardstock.

5. Attach the matted photo to layout using Ultra Thin Glue Dots®.

6. Use Mini Glue Dots® to secure letter stickers to layout.

7. Apply Glue Dots Glue Lines® to layout and attach ribbon. Fold the ribbon edges and secure to back of yellow cardstock using Ultra Thin Glue Dots®.

8. Adhere buttons to layout using Ultra Thin Glue Dots®.

9. Use a Mini Glue Dot® to attach small Petaloo flower to the large one and attach to layout with a Pop Up Glue Dot®.

10. Tie ribbon to handle of gift bag.

11. Apply Removable Glue Dots® to the back of layout and attach to gift bag.

If you haven't already, read The Scrapbook of Frankie Pratt (shown in the photo) - I loved that book! If you're a scrapbooker, you will too! Happy holidays! ~Danielle

More fun holiday project tutorials:


Disclosure: This blog post was created while participating on the Glue Dots design team.

12.12.2012

Eco-Christmas Blog Hop 2012

Welcome to the Eco-Christmas Blog Hop! Today is all about celebrating the holidays with a bit of eco-conscious cheer.

I'm starting off the hop with a lunch sack from Subway and an empty coffee bag.


Let's see what I did...


I took two lunch sacks + one coffee bag and upcycled them into two decorated holiday gift bags. How did I do this?

First, I painted the lunch sacks with black acrylic paint.


After they dried, I stamped them with foam star stamps and white acrylic paint. (Disclosure: My stamping abilities are still below average and I used a white paint pen to touch up the stars.)


I added white rick rack to one of the lunch sacks using Mini Glue Dots and then I moved onto making bows out of a coffee bag (Organic Seattle's Best #4 - my favorite!).

Tutorial: How to Make a Bow From a Coffee Bag

Supplies for coffee bag bows:

empty coffee bag
paper shredder or fringing scissors
scissors
stapler
craft knife
wire

1. Remove the closing tab from the coffee bag and cut the bag in half. Fringe the top half with a paper shredder or fringing scissors (I had to go back and cut through the plastic coating with scissors), cut in half, then use scissors to curl the ends. Cut a small hole in the middle of the unfringed bottom half of the coffee bag and set aside.

2. Roll up each fringed half. Set one bow aside.

3. Insert the rolled up fringe into the bottom half of the coffee bag and secure in place with a staple. Cut off the excess below the staple.

4. Use a craft knife to cut a small slit near the staple and insert wire.

5. The coffee bag bow is ready to be added to the gift bag.

Use the closing tab to secure the second bow to an additional gift bag. Here are close-ups of the two coffee bag bows:


The final step was to cut up old greeting cards to create gift tags. I tied them to the gift bags with Sew Easy floss. Done! Hope you liked my Eco-Christmas holiday gift bags! It's now time to hop on over to the next blog. ~Danielle

Participating blogs:

You are here--> Danielle: EcoScrapbook
Next stop--> Jules: Inspired Jules
Dani: Scrapper on the Street
Renee: Charms Buttons & Bows
Lisa: The Cherry On Top
Alex: meli-melo studio
Erin: Deeply Rooted Life
Leslie: Momma Harvey

Happy Holidays!