Showing posts with label Instagram. Show all posts

12.11.2013

An Eco-friendly Christmas Scrapbook Layout

"Capture the Moment" 8.5x11 Eco-Friendly Christmas Scrapbook Layout
 
As I scrapbooked my 2012 Instagram photos, I included not only good quality photos, but also the bad ones. There are times when moments fly by so quickly, like when my girls had a brief encounter with Santa, and time was limited to snap the perfect shot. 

I still wanted to capture the moment and document the magic of Christmas when I was on the dance recital stage with my girls and Santa, as well as when we watched the the Toledo Zoo's tree light up for the first time of the season.

Scrapbooking is all about the memories and sharing them with others and I think I did just that on this eco-friendly scrapbook layout. ~Danielle

Supplies: FSC-certified cardstock, October Afternoon cardstock and embellishments, Cosmo Cricket notecards and stickers, stamp, twine, two Instagram photos.

Related:


10.16.2013

A Build-A-Bear Doppelganger Says Boo!

A Build-A-Bear doppelganger says boo! Say what? 

As our sweet furry cat relaxed on the dining room floor, she had no idea what was coming. My daughter brought home a new Build-A-Bear that looked almost like our cat. I snapped photos as the doppelganger crept closer and closer and finally, our cat turned around for the shock of her life!

"Boo!" 12x12 Halloween Scrapbook Layout Using Paper Scraps

I scrapbooked both the original photo and it's doppelganger, a shared square Instagram. You can see a close-up of our wide-eyed cat below:


This layout features paper scraps from previous projects. I just love creating the banner effect with my leftover scraps.

Stay tuned for more Halloween-themed scrapbook layouts this month! ~Danielle

Related:

What happens when you start a scrapbook layout with paper scraps?
Easy Business Cards You Can Do Yourself
8 Scrapbook Starting Points Using Designer Scraps

10.09.2013

Tell the Story & Keep on Truckin'

As scrapbookers, it's our responsibility to tell the story and keep on truckin'. Sometimes it's fun to document the process like these two-page layouts below:

"Tell the Story & Keep on Truckin" Two-Page Scrapbook Layout

Supplies: black cardstock, Cosmo Cricket cardstock & diecut stickers, washi tape, Scenic Route Stickers.

"I Craft A Lot" Two-Page Scrapbook Layout
Supplies: kraft cardstock, Colorbok chipboard letters, the negative side of chipboard arrow, acrylic paint.

Have you scrapbooked about crafting or scrapbooking? ~Danielle

Related:

4 Examples of Minimalist Scrapbooking
How I Organize My Eco-Friendly Craft Supplies
Scrapbook Comparison: 2005 vs. 2012

10.02.2013

4 Examples of Minimalist Scrapbooking

You don't need a long list of supplies to create an eye-catching scrapbook layout. When I'm perusing scrapbook layouts on Pinterest or Flickr, I tend to gravitate toward the ones with a lot of "white space" or minimal supplies. I like to put those pages into a category called minimalist scrapbooking.

I spoke briefly about minimalist scrapbooking in last week's post. Today, we'll look at four example layouts using minimal supplies.

One way to reduce the amount of supplies is to downsize layout size. Instead of always scrapbooking 12x12 pages, try making more 8.5x11 or 6x6 albums.

A plain sheet of 8.5x11 cardstock, washi tape, paper scraps and a few embellishments highlight this photo of the tablet I bought myself last Christmas:


"Tab" Supplies: FSC-Certified white cardstock, red scrap paper, Bo Bunny stickers, washi tape, Craftwork Cards Candi, black ink, Instagram photo.

Another scrapbook starting point with plain cardstock includes plenty of white space:


"What Happened to It?" Supplies: FSC-Certified white cardstock, CTMH cork arrows, Echo Park letter stickers, Instagram photo.

Many times, designers do most of the work for you and create an almost-finished look to decorative paper, making scrapbooking easy and less time consuming. I added a photo, washi tape, a few stickers and stitches to this scrapbook layout:


"Preschool" Supplies: Basic Grey decorative paper, cardstock, preschool-themed stickers, washi tape, thread, one photo. 

Here's another 8.5x11 scrapbook layout using decorative paper that's almost ready to go. It even includes a title:


"You Make Life Beautiful" Supplies: DCWV (I think) decorative cardstock, ink, two Instagram photos. Note: I trimmed 12x12 cardstock to create the 8.5x11 page, used circle scraps from the leftover strips behind the photos. The music note strips behind the photos where scraps from another sheet of decorative cardstock. I added lines for the journaling.

Read a more in depth discussion about minimalist scrapbooking by Zaira Sierra in her chapter of EcoScrapbooking: Crafty Ideas for Eco-Conscious Scrapbookers. Also, check out Zaira's new blog here with a featured layout by me. ~Danielle

Related:

Scrapbooker Saturday: Zaira
Fast Scrapbooking: Making Time for a Quickie and Where I Do It
Video: Organizing Paper Scraps

7.17.2013

Ways to Stay in Touch with EcoScrapbook

Do you have a favorite social media outlet or simply prefer corresponding through email? EcoScrapbook's got you covered! You can connect with me right here at EcoScrapbook.com, as well as a variety of platforms. Here's where I'm most active at:

Follow EcoScrapbook on bloglovin


Danielle Hunter (ecoscrapbook) on Twitter

EcoScrapbook - Facebook
Flickr- EcoScrapbook's Photostream
ecoscrapbook on Instagram

The EcoScrapbooker Newsletter:

Subscribe to our mailing list

* indicates required
Email Format
View previous campaigns.

6.05.2013

What Have I Accomplished in 200 Posts?

Since I launched EcoScrapbook over two years ago, I never stopped to celebrate a blogiversary or even a my 100th post. Now that I have 200 posts under my eco bloggy belt, it's time to look back at my accomplishments and give myself a pat on the back.

I created a minimalist scrapbook layout to celebrate and used clothing tags for the journaling:

"Accomplished" 12x12 Eco-Friendly Scrapbook Layout

Supplies: cardstock, black and white pens, two Instagram photos, clothing tags, alphas (Jillibean Soup, Bella Blvd., Thickers).

Read more about my top accomplishments from 2011 through now:

  • The EcoScrapbooking eBook became a reality. What started as a simple idea turned into a scrapbooking eBook featuring ten scrapbookers from around the world and plenty of eco-friendly ideas. I was the mastermind and gave it away for free!
  • I was featured on the local news. WTOL contacted me last April and asked me to share a Mother's Day project. I was nervous, but managed my way to the studio and scrapbooked LIVE on the morning show.
  • You can find EcoScrapbook on YouTube. I only made one video about organizing paper scraps and plan to make more (even though I said I was going to right after I did the last one...I have ideas, just need to make the time).
  • I started a newsletter! It's called The EcoScrapbooker and you can sign up over in my sidebar. I've only sent out one email so far and just need to find my groove of writing monthly updates.
  • Speaking of teaching, the Memories Scrapbooking Expo in Columbus, Ohio welcomed me and my eco-friendly crafting abilities as I taught the Recycled Scrapbooking class in March.
  • I was also a featured scrapbooker during May's Layout a Day and shared several sample layouts with over 400 participants.
  • As a Glue Dots Dottess for almost three years, I've created plenty of project tutorials on this blog and my old one, but once I started EcoScrapbook, I focused on eco-friendly crafting. There are 38 upcycled craft and scrapbook projects right here that use Glue Dots.
  • Sharing the love - one of my favorite blog series was called Scrapbooker Saturday where I featured different scrapbookers and their eco-friendly tips.
  • And I almost forgot about another favorite series from 2011 and then a blog hop in 2012, 12 Days of Eco-Christmas, which showcased several eco-friendly Christmas projects.
  • Let's talk blog traffic. I don't completely ignore it as I do like seeing visitors on my blog, but it's not a priority. It makes me feel good to blog every week and I must admit seeing over 11,000 visitors in March felt pretty dang awesome. My most popular post features three cute Easter bunnies made from toilet paper rolls. Who woulda thunk?!

There are plenty of other accomplishments, but I think I've covered most of the big ones. I'm glad I did this post and had a chance to review the past two years. I'd like to suggest you do the same.

What have you accomplished since you started your blog? If you do your own post, shoot me an email, tweet me or link up your post in the comments. ~Danielle

3.20.2013

8 Scrapbook Starting Points Using Designer Scraps

8 Scrapbook Starting Points Using Designer Scraps

I bet you have designer paper scraps stashed away. It's time to pull them out and get creative! I've found that I like to design a layout without a photo in mind and enjoy digging into my leftovers to see what kind of mix I can come up with.

By starting a scrapbook layout with paper scraps from a specific company or kit, it's easy to mix complementary designs and colors. And it's more fun to see how the layouts change once photos, titles and embellishments are added into the mix.

Let's have a closer look at my scrapbook layouts made with designer scraps. All layouts are 8.5 x 11 inches.

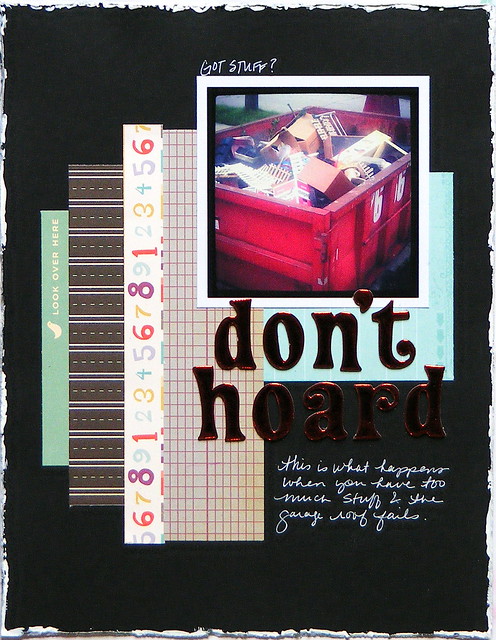
"Don't Hoard" scrapbook layout using Cosmo Cricket:

Don't Hoard LOAD213 Day 11

Supplies: black cardstock, paper scraps (Cosmo Cricket), letter stickers (Thickers), Distrezz-It-All, white acrylic paint, white pen, one Instagram photo.

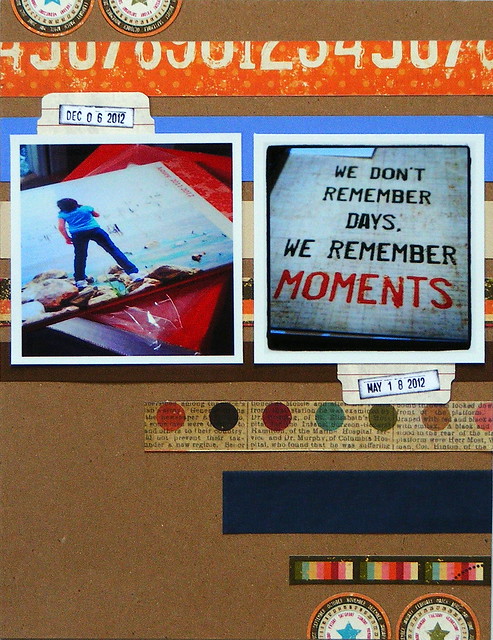
"We Remember Moments" scrapbook layout using Simple Stories:

 Scrapbooking LOAD213 Day 1 

 Supplies: kraft cardstock, paper scraps (Simple Stories), sticker (Simple Stories), tabs (Creative Imaginations), stamp (Smash), black ink, two Instagram photos.

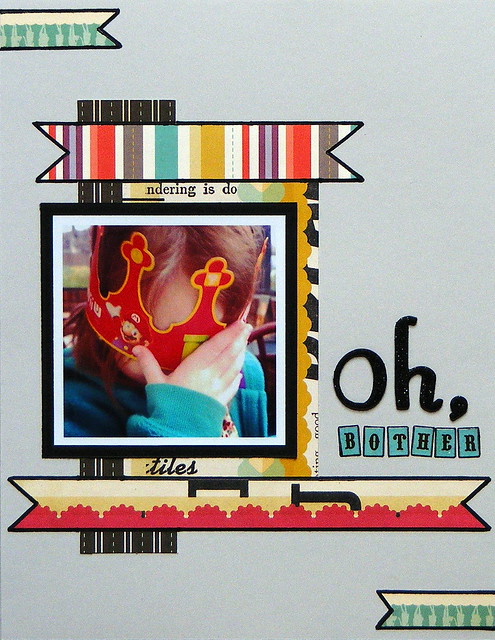
"Oh, Bother" scrapbook layout using Cosmo Cricket:

Oh, Bother - A BK Embarrassment LOAD213 Day 19

Supplies: gray cardstock, paper scraps (Cosmo Cricket), letter stickers (Thickers, Echo Park), black marker, one Instagram photo.

"Honey" scrapbook layout using Pebbles and paint:

Honey LOAD213 Day 5

Supplies: white cardstock, paper scrap (Pebbles), black acrylic paint, washi tape, letter stickers (Thickers, Cosmo cricket), black pen, two Instagram photos. 

"Nature Walk" scrapbook layout using Fancy Pants:

Nature Walk LOAD213 Day 3

Supplies: kraft cardstock, paper scraps (Fancy Pants, red cardstock), letter stickers (Cosmo Cricket), stamp (Smash), brown ink, brown pen, one Instagram photo.

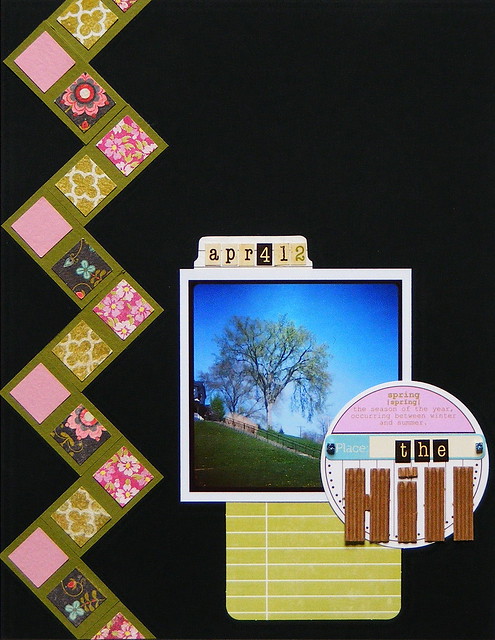
"The Hill" scrapbook layout using MemoryWorks Whimsy Kit (April 2011):

The Hill LOAD213 Day 21 

Supplies: black cardstock, paper scraps (Basic Grey, My Mind's Eye, assorted color), diecuts (Jillibean Soup), tab and journaling card (Creative Imaginations), letter stickers (Simple Stories), one Instagram photo.

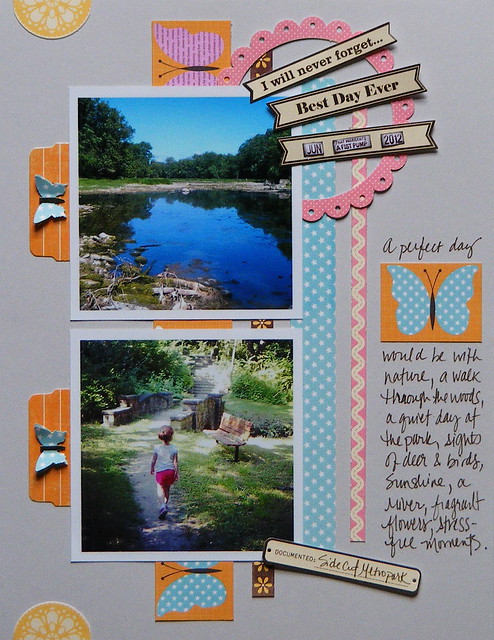
"A Perfect Day" scrapbook layout using Jillibean Soup:

Side Cut Metropark LOAD213 Day 2

Supplies: gray cardstock, paper scraps (Jillibean Soup), diecuts and stickers (Jillibean Soup), tabs (Creative Imaginations, stamp (Smash), brown ink, brown pen, butterfly punch, two Instagram photos. 

"Ankle Surgery" scrapbook layout using Simple Stories:

Ankle Surgery LOAD213 Day 12

Supplies: gray cardstock, paper scraps (Simple Stories), letter stickers (Cosmo Cricket), cork stickers (Close To My Heart), dots (Craftwork Cards), journaling paper (Smash), three Instagram photos.

Want more scrapbook starting points using paper scraps? Check out this post! ~Danielle

Related:

Making Handmade Paper
Video: Organizing Paper Scraps
3 Scrapbook Layouts That Use Photo Scraps

1.30.2013

Valentine's Day Tutorial: Coaster Scrapbook


This little coaster scrapbook represents the early years of my relationship with my husband. I've called it Pics From The Vault since the majority of photos have never been shown to our children...until now. 

Many of the photos were taken while we were still dating at the end of 1999 and into 2000. To make them look like Instagram prints, I photographed the originals and downloaded them to my computer. Using Picasa, I cropped the photos into squares, added a black and white filter, along with the Holga-ish filter and printed them at Shutterfly (click here for my Instagram-printing tutorial).

Let's have a look inside:


I purged supplies from my stash, used a coaster book from Maya Road and my trusty Glue Dots®. The love-themed Fancy Pants cardstock and journal pages from BoBunny were purchased a few years ago, so I'm happy to see these finally get used (especially the cardstock with two blue birds). Here's how I made it:

Supplies:

Glue Dots® (Micro, Lines, Ultra-Thin)
Maya Road coaster book
Fancy Pants cardstock
BoBunny journal pages
Basic Grey stickers
Prima flower
StazOn black ink
small hole punch
square photos
white cardstock
paper trimmer

1. Remove chain from coasters and set aside. 
Trim cardstock to fit coasters and attach using Glue Dots Glue Lines®. 

 
2. Punch holes into cardstock for chain.


3. Decorate the coaster book with journal pages, photos and embellishments. 
Adhere decorations to book using Ultra-Thin and Micro Glue Dots®.


4. Ink the edges of the coaster book pages.


5. Type journaling on word processor, print on white cardstock and use paper trimmer to cut the lines into strips. Use Glue Dots Glue Lines® to attach the word strips to the coaster scrapbook.


6. Insert chain back through coaster scrapbook and secure clasp.

After I was done, I excitedly shared this coaster book with my girls and hubby. It feels great to finally document these photos and dig deep into my scrapbooking stash for a little purging.

What supplies have you been holding onto for too long? ~Danielle

Related:

11.07.2012

How to Print Instagram Photos

Last week, I shared my Instagramed Week in the Life Project. Today, I'd like to show you how I printed my Instagram photos on Shutterfly. 

After transferring the photos from my phone to my computer and then to Shutterfly, I chose the prints I wanted to order and went to the Cart page. I clicked Preview:


And then Adjust cropping:


I chose the Custom crop tool:


to create a square photo:


I chose the Free option to print the square Instagram photo as a 4x6 print.


Back on the Cart page, I was able to review the print to make sure the image fit the space perfectly and wasn't cut off. I had to do this for every Instagram photo - a bit tedious, but worth it.

I placed my order and waited for the bright orange package to arrive. Once it did, I cropped each Instagram photo, leaving a white border around each:


 and stamped on the photo scraps to use them throughout the project:


Read more about my Instagramed Week in the Life Project here and view all the scrapbook layouts on Flickr

How do you print your Instagram photos? ~Danielle

Note: I have no affiliation with Shutterfly, but I do utilize their annual print plan so I only have to pay 10 cents per photo and receive a free photo book each year.

Related: